embroidery hoop + lace = halloween decor?

yep.

a quick and satisfying project you can try out this weekend.

i got the idea from ann martin’s blog when she was sharing betz white’s hallowe’en hoop project. such a neat looking craft, and i had all the materials on hand.

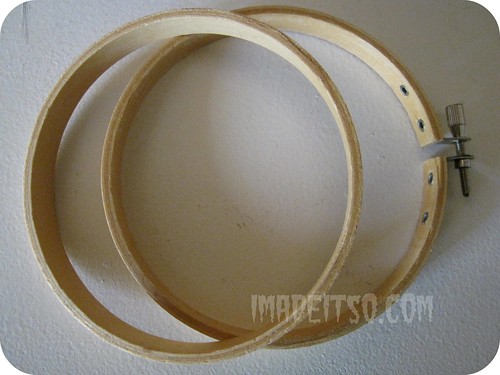
leftover embroidery hoops from our dreamcatcher project:

embroidery hoops wooden

lace (in the form of a tattered old doily):

old doily

mwahahaha ;-)

and the usual suspects:

  • black spray paint (acrylic paint or a black permanent marker would work too)
  • fake spider (you can get these anywhere at this time of year, but i’ll show you how i made mine another time)

i spray painted the hoops black.

i popped in the lace and trimmed the overhang with scissors.

i made and added my spider.

spider web doily embroidery hoop

i used a ribbon to hang it up.

embroidery hoop with doily spider web

kinda cool huh?

this is the sort of nutty craft project which will convince my family that i’ve finally gone “over the edge” — well, it’s about time they knew. i’ve been here a while, and it’s a really fun place. thanks for joining me! :-)

happy weekend all!

*** i shared this project with kootooyo’s my creative space. join in every thursday, and visit other creative spaces. tons of inspiration there!

© imadeitso, 2010. Unauthorized use and/or duplication of this material without express and written permission from this blog’s author and/or owner is strictly prohibited. Excerpts and links may be used, provided that full and clear credit is given to ana at imadeitso.com with appropriate and specific direction to the original content.
Posted in ideas & inspiration, sewing & fabric arts, tools, tips and techniques, yarn | Tagged , , , , | 24 Comments

answering some questions about my new header

to make the image for my header, i used the adobe ideas application on an ipad and doodled it. actually, i started with the original drawing i had made using ideas, in the summer:

original adobe ideas doodle image imadeitso.com

(look at me all smug in my garden! the doodle was a bit rough, i was just learning.)

then i updated it for fall, used a little bit of photoshop to carry the grass and leaves across the bottom of the image, and to resize the image to fit the header space. here is the final doodle:

ana twitter background image

* note: i added some side-swept bangs, because i got a haircut and i’m all about accuracy here ;-)

a cartoon artist/twitter friend, eric orchard, said that adobe ideas is like…

… the equivalent of having a napkin and a pen everywhere you are. It’s not perfect control but it’s really handy.

i agree. it was a bit fiddly at first for me, as i tried to get a feel for the features, resizing the page, zooming in/out. i also found i had to exaggerate some of the strokes because it smoothes out your lines (you’ll know what i mean if you use it — i believe the feature is called “vector smoothing”). but it is simple and a lot of fun to use.

i saved the image and edited the exposure in flickr (picnik) to make the colours darker. i could have done that originally in ideas by using a more opaque setting, but the original was a lot fainter, so this was a simpler solution. then i uploaded it to wordpress as the new header image.

i did the same thing to write the blog title as well.

i believe adobe ideas is available as a free iphone app as well. i haven’t tried that though. you all know about my cell phone

speaking of which, i’m not very comfortable in the realm of technical/digital things, but this was easy enough for me, so i thought i’d share the process with those of you out there who asked or who might be curious to try it out.

here are the links for the free, adobe ideas app:

adobe ideas – for iPhone

adobe ideas – for iPad

you can see some of my other doodles using adobe ideas, here:

the news

yogurt commercials

count on family to keep it real (i kinda like this one)

© imadeitso, 2010. Unauthorized use and/or duplication of this material without express and written permission from this blog’s author and/or owner is strictly prohibited. Excerpts and links may be used, provided that full and clear credit is given to ana at imadeitso.com with appropriate and specific direction to the original content.
Posted in 2D art, tools, tips and techniques | Tagged , , , , , , , | 31 Comments

october 20th ~ world osteoporosis day

i was approached to share a link for world osteoporosis day, which is tomorrow. the link had a risk calculator and i’m sure a lot of other useful information. it was, however, sponsored by a pharmaceutical company.

i am an ad-free site (actually, i have to pay to make it so — how does that work? a whole other post…) and i can’t in good conscience share that link here.

i can, however, support spreading the word about world osteoporosis day through the IOF, an international, non-governmental, non-profit organization based in switzerland, dedicated to bone health. as far as i can tell, they do good work.

if you are interested, click through to learn more.

then please join me tomorrow when i plan on answering some questions i’ve received about my header image, above.

Posted in thinking out loud | Tagged | 1 Comment

marimekko fabric: what would you make?

mr.madeItSo was lucky enough to have a chance to visit sweden recently. i’ve hinted pretty heavily that if you travel anywhere and want to buy me something, you can’t go wrong with fibre (yarn or fabric) from that area.

mari mekko fabric

before returning home, he visited a marimekko store in stockholm.  marimekko is a finnish clothing and textile store. he may have had a little guidance from a certain ninja (if you’re reading this, thank you!) and purchased some very cool designer fabric for me.

i have a few ideas for what i want to make with it, but i thought i’d ask all the creative minds out there…

meri mekko fabric

what would you make with 1.5 metres (just under 5 feet) of this fabric? there is a penny on the fabric above, for scale. keep in mind that the print is directional. it is a buttery soft oilcloth, so it has some water repellant qualities as well.

mari mekko fabric

what do you see this becoming? garment, accessory, home decor? what would you make? links to other projects you may have made are welcome :-)

© imadeitso, 2010. Unauthorized use and/or duplication of this material without express and written permission from this blog’s author and/or owner is strictly prohibited. Excerpts and links may be used, provided that full and clear credit is given to ana at imadeitso.com with appropriate and specific direction to the original content.
Posted in ideas & inspiration, sewing & fabric arts | Tagged , , , , | 34 Comments

old clock, new clock: how i made my audrey hepburn clock

i see old clocks in thrift stores constantly, and i’ve always wondered if i could somehow take them apart, keep all the good bits, and change the rest. i finally caved in to this idea the other day.

i liked the oval shape of this clock, not too ornate. i liked that it was made of solid wood and the hands were a nice shape.

wood oval clock

the mechanism seemed to be working fine once i put a new battery inside, but the rest of it could go.

back of clock, mechanism

i used a screw driver to pry open the staples that were holding the backing in place, and pulled them out with pliers.

taking the back off the clock

the clock was pretty dusty and gross, so i cleaned up the frame and mechanism with a damp cloth and washed the glass.

i removed the clock mechanism from the clock backing (the white piece of cardboard with the numbers). it came apart fairly easily, starting with the minute hand being pulled straight off, then the rest of it being unscrewed. i did take a photo of it just in case i forgot how it all went back together again :-)

taking clock mechanism apart

i used the old clock backing as a template to trace out a new backing. i used an old album cover (also thrifted) as the artwork for my new clock. the album cover works well too, because it is thick cardboard. if i had used another image, say something on paper, i would probably use the original clock backing (or trace a new piece of cardboard) and glue it behind the image to give it some structure. the clock mechanism depends on a sturdy clock backing.

tracing album cover for clock template

i traced the hole where the hands/mechanism would attach…

tracing the center hole of the clock

then i cut a small “x” there using a sharp knife.

cut small x for where the clock mechanism would go

i trimmed the rest with scissors and i found that it didn’t need to be a perfect circle, because the clock mechanism pressed against the cardboard just fine and the hands would cover the opening.

pressing clock mechanism through backing

i reattached the mechanism, hands, placed the backing on the clock again, and…

almost finished clock, wood finish

ugh. i don’t know. do you like it?

i felt that it was totally wrong. i intentionally didn’t add numbers because i didn’t want to obstruct the artwork — and i’m fairly confident in my time telling abilities ;-) … but the handle from miss hepburn’s parasol was visually distracting to the hands of the clock.

and i wasn’t crazy about the colour of the wood after all.

nothing a few coats of “heirloom white” spray paint wont take care of though!

(some of my tips on spray painting can be found here and a few other spray painted projects are here and here)

i took it all apart, lightly sanded the clock frame, and painted the frame, the hour and minute hands. i left the second hand red, as it was.

i think that did the trick.

finished audrey hepburn clock

a close up of the artwork from the my fair lady album.

close up of album artwork my fair lady clock

one my favourite movies too (i was also in the pitband for the highschool production of my fair lady, and know almost all the songs off by heart)…and, well, who wouldn’t want to have a little bit of the lovely audrey hepburn in their home?

clock before after clock

a few notes:

  • let the clock run for 24 hours to make sure the time is true
  • replacement mechanisms can be found at most craft stores
  • make sure the clock hands are not screwed in too tightly
  • old clocks may have bent or warped hands (you can see on this old clock face where the minute hand has traced a path where it was touching along the top of the clock) or the hands may get bent as you remove them; make sure the hands can rotate freely around the clock without getting in the way of each other.
  • the backing can be reattached using staples. i didn’t want to use a staple gun or hammer for fear of breaking the glass; thumb tacks may work as well, depending on the material of the frame. heavy duty tape works too, it’s on the back so it’s not visible. if you’ve done a project like this and have other ideas, feel free to share.
  • craft stores and dollar stores have all kinds of solutions for transfer/rub-on/sticker numbers that you could use if you want numbers on the clock; or you could just draw your own numbers or markings in place.
  • i’m sure you know, but please take care while working with glass and sharp objects.

and if you’ve made it down here, thank you! have a wonderful weekend!

~ ana

i shared this post with sarah and her readers at thrifty decor chick. tons of ideas and inspiration there!

and also…

As seen on CraftGossip.com

© imadeitso, 2010. Unauthorized use and/or duplication of this material without express and written permission from this blog’s author and/or owner is strictly prohibited. Excerpts and links may be used, provided that full and clear credit is given to ana at imadeitso.com with appropriate and specific direction to the original content.

Related Posts Plugin for WordPress, Blogger...
Posted in around the house, something old, something new, thrifting & vintage, tools, tips and techniques | Tagged , , , , , , , | 48 Comments